My friend, Travis Piper, showed me this table he has had since he was a kid; it’s thought to be from the 1930s. It’s very unique the way it folds up when picked up in the middle. I really like the design, shaker-esque in nature. I modeled it in Sketchup. My only change was to the skirt, adding and arch, instead of the mild scallopy profile that is on the original. My rendering’s metal support rails are a bit too slivery; I think I would make them a flat black, if I were to make a reproduction.
Tag Archives: sketchup
SketchUp – My Secret Weapon
Woodworking, as in any business, requires that you have tools at your disposal that the other guys don’t have, in order to beat them to getting customer dollars. I’m not talking about a dedicated mortiser here, but “tools” outside of the shop, such as marketing, great designs, technical skills, contacts, and such. I’m blessed, in many respects, that I was able to bring a lot of great tools to this profession – a good eye for design, website savvy, a great mentor, creativity, and others. However, I do have a secret weapon – SketchUp, a CAD program, free from a company called Trimble (although Google created it).
For those of you somewhat familiar with SketchUp, please come back from running away from your computer while pulling your hair out and yelling hysterically, while I tell you why it’s my secret weapon, and how it gives me a leg up on the most of the rest of my competition…
In my view, successful marketing involves at least one major component: Vision. Vision is being able to get across an idea to a client, in this case woodworking concept. It’s not enough to say, “Yeah, I could build you this nice bookcase with dentil molding, a recessed cove, two arched cabinet doors, in cherry.” Does that sound really enticing to you, if you were the customer? You might be a great woodworker, but I’m sorry, that kind of description doesn’t get across the vision for this project that you have to the potential client. You need to bring excitement, and create a strong desire. Instead, what if you could show him a photo of the bookcase, customized to his specs? If you’re really good, show him a photo of said bookcase installed in his home! You could show him how awesome it would look, and would certainly go a lot farther in closing the sale. Well, with SketchUp, and a rendering software package (both free) you could actually make this happen.
This is the beauty and power, of Sketchup. Not only can you create dead-on mechanical drawings for the shop, and know for certain they will work, you can create photo-realistic renderings (turning a CAD file into what looks like an actual photo), with no software cost! Change the wood type, move pieces here or there, play with contrasting woods, find weak joint designs, or illogical designs – it’s easy with Sketchup.
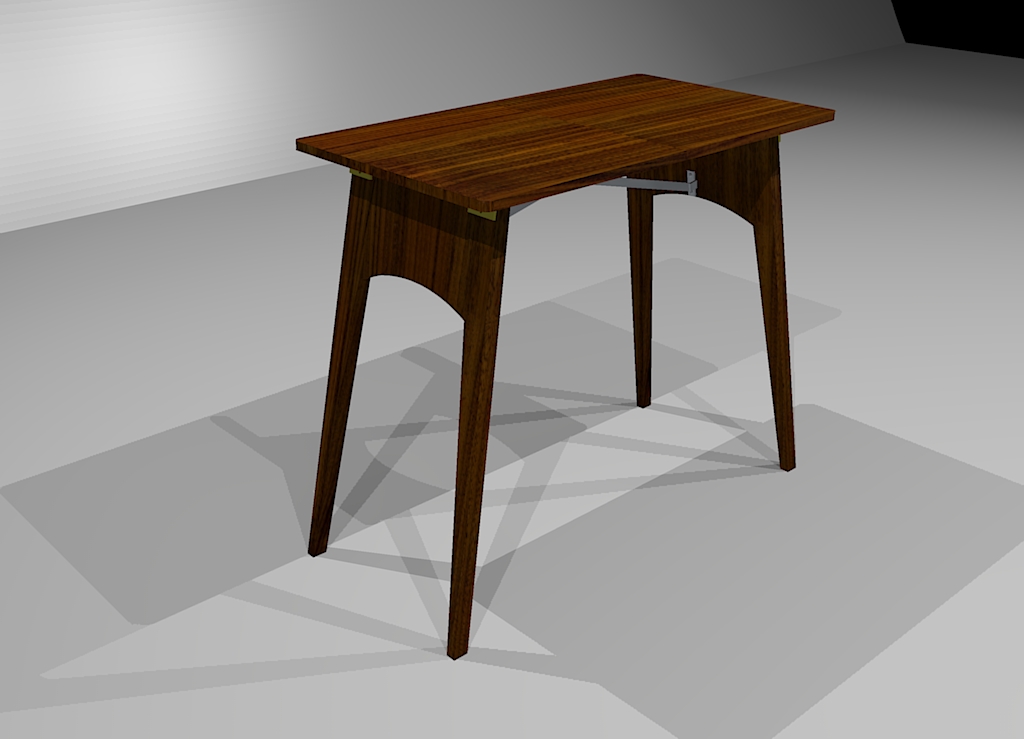
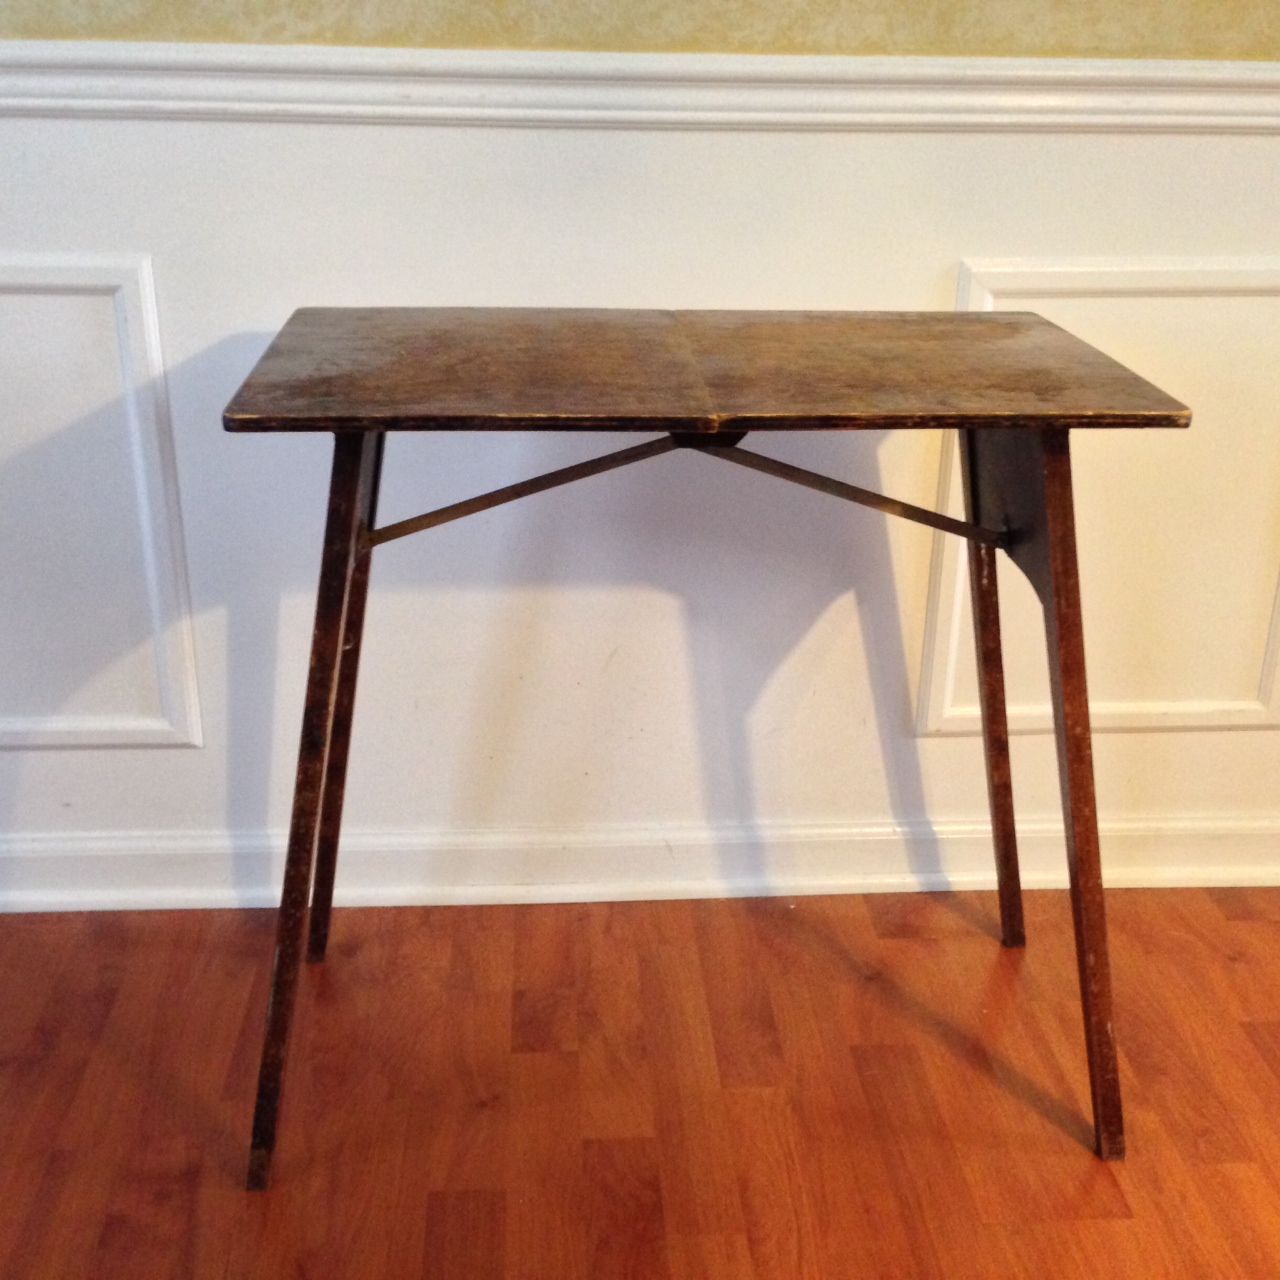
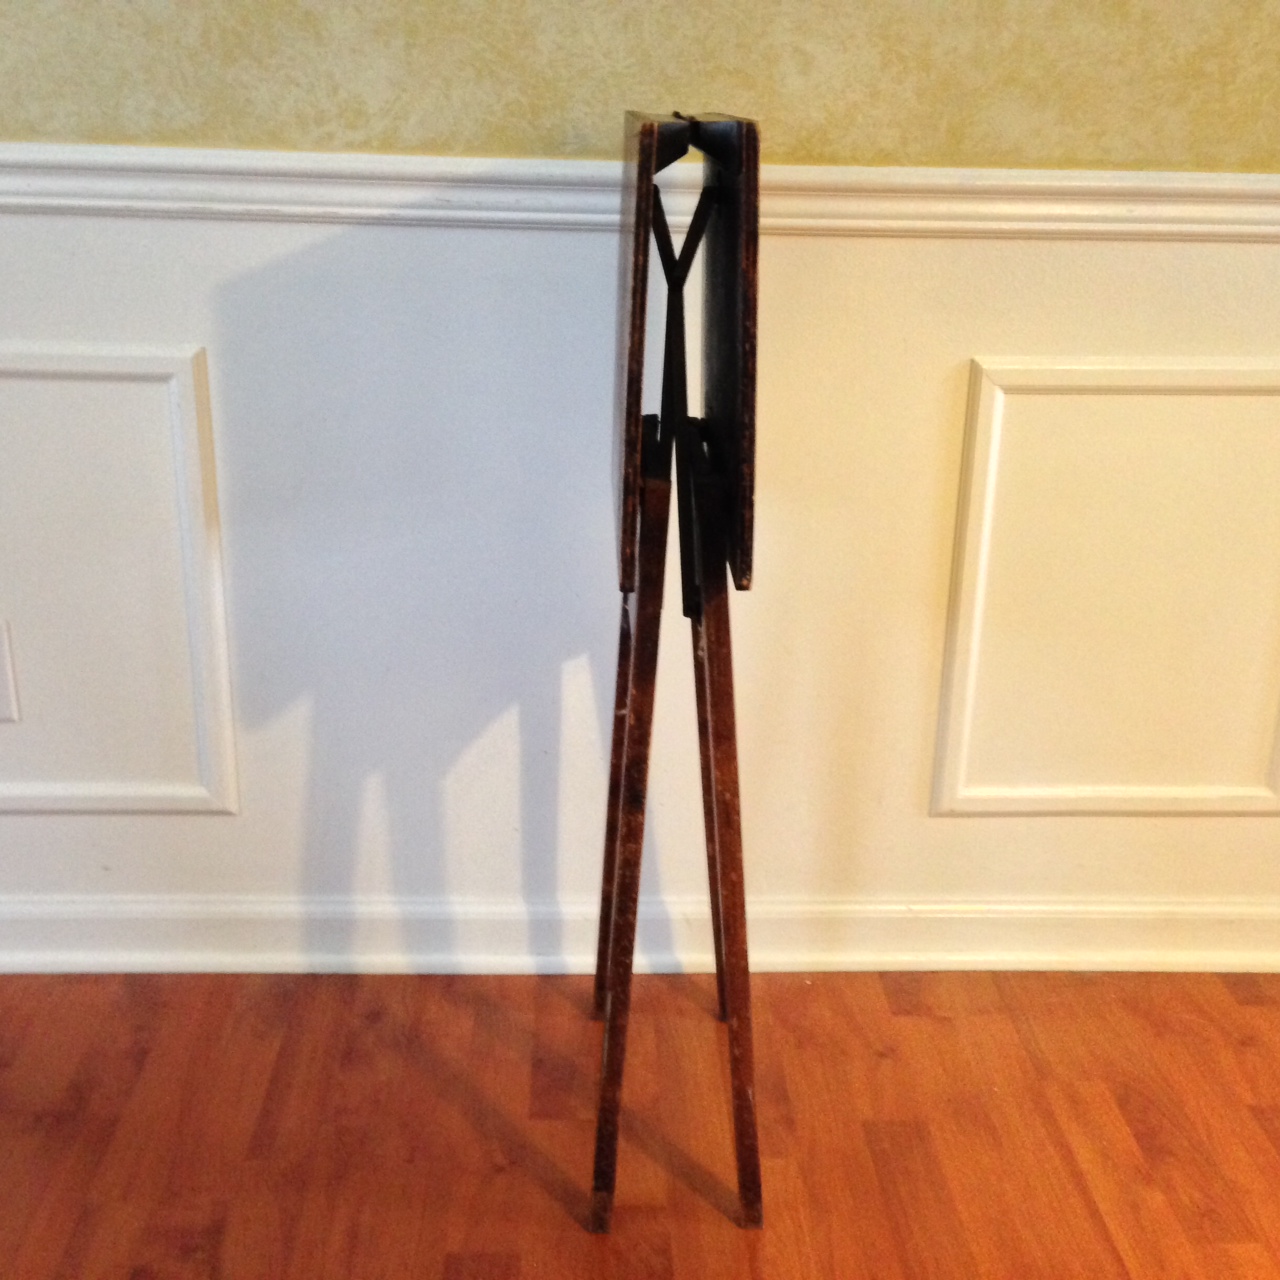
Ah, and there’s the catch – it’s easy for me, now. It sure wasn’t always easy. I actually quit trying to learn it once due to frustration, but thankfully, I picked it back up again and made myself learn it with a For Dummies book, YouTube videos, and help from forums. It wasn’t easy – but it was worth it. I’m a bit new to a rendering program for the SketchUp files, called Kerkythea, but am coming along quite well. The photo in this blog post of the side table, is not real – it exists only on hard drive. A mentor of mine, Dave Richards (a SketchUp authority) made this in SketchUp and rendered it in Kerkythea. You can see the beautifully stained mahogany, and even make out the top coat sheen – a semi-gloss, I’d say. He has the finished piece, and all the parts exploded.
With my Grand Mission Desk, I was able to produce similar results; had I really taken the time, I could have projected this rendering into a real photo, and fool you into thinking this was a real world desk that has been built. As it was, I was only using the rendering to present ideas to a client (he’s buying, by the way), and I wanted to keep the “set” low-key, focusing on the piece, obviously. I have the ability to show the client the desk at any angle he wants, change wood types or stains – everything is very malleable. Can you see how this could give me a tremendous leg-up on a guy that has just sketched something out on paper, or send a photo of a real desk with an addendum, “Just imagine it a little higher, with corbels under the top, and in cherry.”
Yeah, thought so!
So there you have my secret weapon. It’s a challenge to learn, yes, but I really am very happy that I did take the time and pains to do so.
Why You Need to Learn SketchUp
Tools aren’t just in the shop these days, but on the computer as well. I think I spend about 1 hour on the computer designing for every 10 hours in the shop, designing either future products I’ld like to offer, or ones that current clients are requesting. I use a free product called SketchUp. SketchUp is a free 3D modeling design program for woodworkers (and architects, interior designs, mechanical engineers, etc), and is available for Mac and Windows machines. I need to have accurate drawings so I make less mistakes in the shop, and can create a better product. I enjoy the advantage of being able to create a custom project for a client, and almost build it before I build it, on the computer. That’s a huge selling point to a potential client. As someone that wants to sell something (maybe that’s you!) you need to remove any barriers to that person saying “Yes” to a sale. Not being able to visualize the product is one of those things. “Yeah, I can build you a cherry desk with two drawers” isn’t good enough; it’s too…sketchy. I can build you this cherry desk (showing the potential client a rendering) is a much better, and makes the client feel more secure. Also, learning SU (SketchUp), fosters creativity; you can mix and match woods, change any part easily, go crazy. More accuracy, better chances at a sale, fostering creativity – this is why I state You Need to Learn SketchUp!
Learning SketchUp
The hardest part of SketcUp is learning to use it. I gave up once trying to learn it, but thankfully came back to it, and am quite proficient now. I reached out to experts like Dave Richards who has a free blog you can use at Fine Woodworking, titled Design.Click.Build. Dave has also put out a DVD and book for beginners, which you can find here. There’s also a “for dummies” book found here. And there are many videos on YouTube. Is it difficult to learn? I’d have to say yes. Is it WORTH IT to learn? A definite yes.
While in SU, you see a pretty crude model, but certainly good enough to work with. This is the model you’d work with to get where you want to be on the project. Let me give you a real world example…
A friend of mine had this table – it’s probably made in the 30s. It’s an interesting table in that it folds up, when you pull up at the center joint. There was just something about it that struck me. Here’s a pic of the actual table.
Any way, I asked him if I could borrow it to make drawings – and so I went to work recreating it in SU. I took all the measurements, including the hardware, and the working model drawing came out like this. As you can see at this point, there is already a strong resemblance to the actual table. The change I made was using walnut as a texture, rather than the maple (I believe) that the original was made of. At this point, if I wanted to go ahead and build it, I would “explode” the drawing – moving the separate pieces apart and putting in ruler measurements for each piece, printing out the screen shots of the pieces, and going down to the shop to build it.
But let’s say that I’ve come up with this table on my own for a client, and wanted to present the idea to the client in the best possible light. I probably wouldn’t send the working SU model, but rather would render the project. What is a rendering? A rendering engine (program) takes a file from a CAD (computer aided design) program – in our case, SU – and “renders” a photo that looks realistic. Some CAD programs can do this from within itself, but many rely on external, third-party programs to accomplish this. I use Kerkythea (care-ka-thea) for rendering from SU.
So why would you want to go through all this trouble to render? Other than looking cool, what’s the benefit to a woodworker? Well, for one thing, it’s really not all that much trouble, and secondly, you get a much better idea of what the end product will look like – far better then the rather cartoonish rendering that SU shows you. More importantly, if you do woodworking professionally, you can show a potential client a piece that is already “built” and change woods, dimensions and scales easily. Make the mistakes in the virtual world before making big mistakes in the shop.
If you are already pretty proficient at SU – no mean feat – then you are ready for Kerkythea – it’s much easier to use then SU. It’s also free, like SU; you can get it here. I won’t rehash how to install Kerkythea – they explain it.
SketchUp & Kerkythea = Awesomeness
If you use SketchUp for woodworking, and you really enjoy the way it helps you in the shop, you might want to take it to the next level, and get into photorealistic renderings such as Kerkythea; it’s a great tool to put the finishing touches on design idea, and getting that client to commit!
Sketchup & MockUp: Powerful Tools
I’m developing a small mantle clock with a low price point for the Christmas season; I’ve been made aware that could be what people are looking for. Low price point, handmade, good styling – should translate to sales.
One tool of the trade I use often is Google’s Sketchup program. Usually, I’ll just work up the piece in that, and go right to building the piece. However, sometimes things don’t translate right, or I don’t see things in Sketchup that I see in a real piece; this is speaking from the experience of past projects.
SO, this time, I made the Sketchup drawing, produced a rough prototype, and lo and behold, found some things that needed to be changed, both technically and aesthetically. So, made the changes in SU (Sketchup) and will now go right to a finished piece.
Between those steps, however, is yet another. Since this mantle clock will be a small run production piece, efficiency is important; I don’t want to have to mill 8 different kinds of thicknesses, for instance. So I have to make sure the parts in the SU drawing have a minimal amount of different thicknesses, and will also make a cutting diagram to minimize waste and time. Like the saying goes, time is money, and the more quickly I can make these mantel clocks, the more money I make per piece. I actually need a play book – what I’m going to cut, how to buy the lumber (milled or rough), and so on.