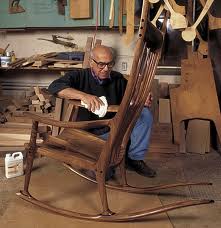
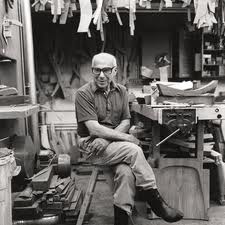
RSS

Category Archives: BlogNotes

Blogging about my adventures in woodworking. Yes, you will read it.

I Can’t Get You Outta My Head – Ideas That Won’t Materialize

creativityI made the point, in my previous ShopNotes post, that a large part of what makes a person very successful – really, in any endeavor  – is the ability to generate original ideas that are good. You’re not going to be hugely successful just re-doing what someone else has already done; you must be original to really stand out and be really succesful.

I am trying to be more and more original in my woodworking; I get these little lightbulbs going off for an idea for this design, or that design, and it seems to be a very good idea – however, getting it from that initial vague idea to a finished product is very difficult – at least for me – and I’m a very creative person.

For instance, I’m trying to design a new mantle clock, in the Mission/Craftsman/Arts and Crafts style. It’s been very difficult, because you have to retain the hallmark style of this genre – straight lines, few curves – yet try to do something different as well, instead of the usual horizontal or vertical rectangular shape. Your only options with the dial face is either round, square, or if you dare, rectangular. I want this to be a mainline product, so I want construction to be pretty simple, and have a basic shape that I can them just ornament differently for different styles.

It’s making me a bit crazy.

I’ve looked around – a lot – for inspiration, and have found very little.

Then, there is trying to create a new piece entirely, in terms of a new piece of furniture, or for what I’m thinking, a table-top piece. It’s something people can use to remember others by; a kind of altar / photo holder. It would be something very different, and have sentimental emotion tied to it, which is never a bad thing for a product you’ve been trying to sell. That idea has been in the slow cooker in the back burner of my mind for a couple of years now. I’ve tried working it up in Sketchup, and free lance building a little prototype, but it’s just not there yet. It’s like a new stew I’m trying to create, but don’t have all the right spices for. I know it’s out there, somewhere in the land of dreams, and I’m trying to grab a hold of it, but it remains elusive.

The secret to creativity is knowing how to hide your sources.
-Albert Einstein

 
Leave a comment

Posted by on April 17, 2013 in BlogNotes


The Music and Woodworking Business: A Lot in Common?

beatles

The Beatles

Being a world-class woodworker and a superstar musician have quite a bit in common – not that I’m either, just from my observations.

Why do some musicians – I’m thinking the Beatles and Bach – make it to the top, and have a permanence, and others don’t? Along the same lines, why do some woodworkers make it to the top – Maloof, Stickley and Krenov – and others don’t? What pattern are they following? I think I’ve identified some components:

• They are technically proficient. Great woodworkers and musicians have mastered the technical aspects of their profession, be that a piano or a dovetail.

• They are the pioneers. Who was the second man to step onto the moon? Name a famous Beatles tribute band. Exactly. The original – the person that does something really different – is the one that gets noticed, and usually, famous. Copying does nothing. I can copy a Krenov cabinet, but so what – thousands of other woodworkers can too.

• They have original ideas. The Beatles could play well, true – but so could other bands. Technically, they weren’t outstanding – none of the lads had formal instruction. Yet, they were outstanding. Why? Because of their songs. They wrote their own material and played it. Likewise, Maloof had his rocker, Stickley his simple designs and Krenov his cabinet. Notbody did like them (or as well as them) before they came along.

Maloof

Sam Maloof

• They get noticed. Music is a performing art, so of course, they get noticed. They also have the benefit of easily being recorded and replayed for ever. We woodworkers have a harder time of it; we have to go to juried shows, or shows in which large scale buyers show up to get noticed (not including ads we take out, of course).

• They are passionate. They love what they do; they think about it just about all the time. They make time for it. Someone that isn’t usually passionate won’t excel in their field.

So there you have some reasons why some people excel in a field, while others flounder. Yes, you could get some guys together, and they can sound a lot like the Beatles; you can find a guy to make you a Krenov cabinet – but what’s hard to find is someone with the passion to excel, who can dream up new things, and be technically proficient enough to carry out their vision.

 
Leave a comment

Posted by on April 17, 2013 in BlogNotes


Like any business, promotion is required. I found a site, Animoto.com in which to create a very nicely done little promo for the New Mission Workshop. It’s hosted on YouTube, and I have it in my profile over at CustomMade.com

 
Leave a comment

Posted by on April 15, 2013 in BlogNotes


Tags: ,

Kreg Joinery – Nice Solution

Kreg JoineryTwo years ago, my wife asked me what I wanted for Christmas. Pulling out one of my tool catalogs (also known as “tool porn”), I picked out a Kreg Joinery Master System. It wasn’t something I was particulary wanting, but it looked kinda interesting, and really, I couldn’t find anything else, so I asked for that, and got it.

Well, I never cracked it open until a few months ago. I thought I’d try it for a project in which I really didn’t want to go through a bunch of joinery contortions, yet wanted a decently strong joint of course, so recalling the Kreg set, I cracked it open and practiced on a couple of pieces of scrap to get the hang of how to use it, and the joints seem impressively strong, even without glue.

Well, I used it for a few different projects, and yes, I am very impressed. You can assemble a joint very quickly, and more importantly, get a very tight and clean joint. Glue is not really required, in most cases, but if you are REALLY needing an ultimate joint, of course you can “glue and screw” if you like. The system is very easy to use, once you figure it out; Kreg includes a short DVD. The components of the system are very good quality. The jig is plastic, but heavy duty, and nothing to worry about, in terms of durabilty. The special drill is top quality, and the screws are very tough; I haven’t snapped one off yet, and I really don’t think I will. Screws self tap, so you don’t split wood, and are very sharp, and come in many sizes and lengths. They use a square bit drive, and it works great. 

I really don’t have a bad word to say about the Kreg Joinery; it’s not for every joint, or course, but it can work in many cases, especially butt-jointed joints, or joints where the screw hole is hidden (you can buy wood plugs of 7 types to match your project, which are virtually invisible when done right). Cabinet makers love this system for face frames, and I can understand why; but it can be used for much more than just that, such as legs and Rails, Edgejoining, Edgebanding, Picture Frames, and 90 degree Panel Joints.

If you’re looking for a way to solve joint drudgery, if you want quick tight joints without the mess of glue (goodbye, squeeze out), give the Kreg Joinery a try.

 
Leave a comment

Posted by on April 13, 2013 in BlogNotes


Tags:

Simple Mission Finish PDF

Simple Mission FinishI have cobbled together a rather nice PDF detailing the way I do my mission style finishes, and I thought I’d share it with you! You can print it out and take it to the shop with you. I think you’ll find it easy and not expensive, and will give you consistent results. For the PDF, click here: Simple Mission Finish

 
Leave a comment

Posted by on April 10, 2013 in BlogNotes


Finish Before You Finish

wood finishFinishing. No, I don’t mean finishing the project, as in completing it, but rather applying stains or topcoats. It’s an interesting part of the project, because it can really make or break a project. Poorly, done, it can make an otherwise great project look amateurish, and just really ruin the beauty of the wood. Done well, it just sets the piece off wonderfully.  Common problems are blotchiness (think cherry), drips and sags, orange peel, dust – and glue squeeze outs, where the now-dried glue prevents any stain or dye from penetrating, and sticking out like a sore thumb. Sure, you can try to sand it down, but then you’ll you’ll probably leave a depression, because you have to sand quite deep, as the glue seeps into the pores quite a bit. Ugh.

I remember on my first big project, a mission coffee table, re-sanding the entire table three times because I screwed up the finish as many times, and I had to get it right; on the fourth try, I did. What a pain to sand into all those tight corners and tight spaces!

Finishing can be such a tough part of the job that there are actually guys out there that specialize in finishing, as in, they will professionally finish your piece for you. It’s really it’s own separate field, just as project design is. The type of wood must be taken into account, as well as the type of look you want – do you want to highlight the ray fleck in that quarter-sawn white oak, or play it down? Does your piece require a tough topcoat, or will a moderately hard one do? How do you get that glass smooth feel? And so many more issues.

As I’ve written in an earlier blog post (“Mistakes are Just Forced Opportunities”), mistakes can actually force you to be creative; however, when it comes to finishing, mistakes can be very costly – in terms of time. Stripping down a whole project can take hours, not to mention the good possibility of damaging it with sanding mistakes. It’s frustrating to have your project come out great up to this point, and a poor finish just make it look awful.

So I’d like to share a tip or two that hopefully will help you make that next project’s finish look great – and done only once!

Most people will complete a project, then finish it. With some projects, that’s fine – if you are painting it, for instance. However, if you run into a problem, such as drips or sags – found, of course, after the stain has dried – then all you can do is try to strip that particular portion of the project and re-stain or dye it;  good luck with that.

Here’s an angle you may have never considered – finish the parts before assembly. There’s several good reasons why:

  • Easily strip and re-finish. Some time ago, I had a project that had ten ship-lapped boards on the back. I had applied the stain – carefully I thought – only to find that the stain had dripped down under a board, and onto another set of boards, hidden to me at the time. I found it the next day, after it had dried. Ugh. Tried removing it with solvent, but it looked blotchy; sanding was an option, but getting into the tight corners was almost impossible. The only solution was to remove the ship-lapped boards, make new ones, finish them and re-install them; looked much better. Had I finished them before installing them, and found a run (or other flaw), I could have easily seen and remedied it. 
  • Prevent glue squeeze out issues. Even being very careful, squeeze outs can occur, and they are a bear to clean up – even when fresh. You want to get a good amount of glue on the joint – and certainly not starve the joint of glue for the sake of preventing glue squeeze out. The solution is prevention all together. Usually, I use a paste wax finish on my projects now; it gives the piece a very smooth, buttery feel, and a nice sheen. The bonus? Glue, if squeeze out should occur, will simply pull right off the wax once it hardens. No need for a chisel or sand paper – maybe a little spackle knife, but that’s all. In lieu of wax, I use blue painter’s tape right at the edge of the joint where the pieces intersect, to catch any glue; this works very well. The painter’s tape leaves no residue either.
  • Much easier sanding. Some guys will put the whole piece together, then sand. That’s often a mistake, as tight spaces make it nearly impossible to sand the whole board consistently. Sanding and finishing before assembly eliminates this problem.
  • Try out new finishes safely. Ok, I’m guilty of this – trying out that new stain or finishing technique – on the finished, assembled project, and not liking it! Can you hear me, cherry? Instead, take a scrap piece from the lumber you used on this project, and try out that new stain. Maybe you’ll have to adjust the final grit of sandpaper, whether to use a sealcoat, or other issues, but try it out more safely.

Now some of you might object to finishing before you assemble, because you fear damaging the finish when you do assemble it. That’s a valid point. Also, you have make sure you don’t finish parts of the project that will be glued, as the glue won’t stick obviously on dyes, stains or topcoats. You simply have to mask off those portions to be glued, and be careful when you use clamps, perhaps using a soft, sanded wood block as a cushion on each end of the clamp jaws; speaking of which – some Jorgensen clamps (as i recall) have orange colored pads on their clamps that will actually ooze an oil out when clamped to your wood – meaning, you’ll have to sand it out. If your pieces to be clamped are finished, this shouldn’t be an issue.

So next time you have a project, try finishing it before assembly; I think you’ll appreciate the benefits.

 
Leave a comment

Posted by on March 22, 2013 in BlogNotes


How to Take Better Pictures of Your Projects – from CustomMade

I just viewed a blog post over at CustomMade.com, a venue thru which I do a great deal of my work through (see my blog post about that here), concerning taking better photos of your work, an issue near and dear to my heart, and I’d thought I’d pass it along.

I’ll be doing a piece on that as well, with more detailed a practical info, in the future!

 
Leave a comment

Posted by on March 11, 2013 in BlogNotes


The $7,000 Lamp

Mission ceiling lamp

“Prairie Lightbox” by Kevin Rodel

Since I’ve been woodworking, I’ve really grown to appreciate items made by hand, by a craftsperson of some kind – I don’t care whether that’s soaps, jewelry, leatherwork, woodwork, stonework, metalwork, painting – you name it; if someone has a passion for a discipline, and is good at what he or she does, I’m lovin’ it, to steal from McDonalds. I also understand now why hand-built items cost a lot more than machine made, one-is-the-same-as-all-the-rest stuff. AND, I also understand that people that are at the top of their field command a top dollar.

But $7,000 for a lamp?

No, not one made of gold ingots or diamond encrusted. Wood and stained glass. Not that large either, made for a dining room.

Well, one of my fellow woodworkers, Kevin Rodel, commands such a price for his ceiling hung lamps or “light boxes” as he calls them, on his website.

Are they beautiful? Stunning. Are they made out of the best pieces of cherry and other materials, and with the highest construction quality? Undoubtedly. But how much of a market does one have for this? How many rich people have bungalow or Craftsman style homes, and are willing to shell out this kind of scratch? I’m guessing not many, but I’m sure there are some. When people want something bad enough, price isn’t really an issue – just ask a crack head.

Mission ceiling lamp close

Wonderful detailing

I can tell you with a good degree of certainty that the materials cost – even given the almost certitude that Kevin out sources his stained glass work – is under $1,000. In the photo on this page, he states this piece is 39″ long by 25″ wide and 12 1/4″ deep. The matching ceiling bracket is 34″ by 24″. And you can see, the piece is mostly glass. I’m guessing there is $50 in wood, maybe another $50 for the leather straps, and perhaps $75 for the electrical? There’s got to be then, about a $6,000 gross for him. Yes, I know that it must take him some time to craft this piece; it IS very intricate, and has a lot of details; but it’s certainly not as labor-intensive as say, a relief carving. Given his level of expertise, I’m guessing he has no more than 40 hours of work into this himself. That’s $150 an hour. Does his level of professionalism command that price?

I’m not sure I can answer that. Certainly, he’s a top notch player in the Arts and Crafts genre of woodworking – just look around his website. Guys like him can really call there own shots on pricing; they have mastered their craft, established credibility (Rodel is also an author of an Arts and Crafts book, and authored articles in Fine Woodworking, and teaches as well.) and have a client base. I’ll leave it up to you to decide if that price is right – please note, I’m not knocking his price.

What I really wanted to explore is a sub-text of that pricing. That’s the highest price I know of for a piece like that. If you look at all of Kevin’s stuff on his website, it’s all high-priced. Again, maybe he can command that price – the guy does great work. But let’s look at it from the (rich) consumer’s point of view. Let’s say you are a rich lady, and you want to furnish your bungalow home you’re restoring in Pasadena. You look around on line for the best pieces. You find a couple of ceiling lights that are very nice, in the $1,500 range. Then you come across Rodel’s page, and see his wonderful work – at $7,000! What must you think? My guess is, you’ll think something like “Wow, his stuff is really beautiful, he must be a top notch craftsman to be able to ask that much!” In other words, the higher the price, the higher his quality must be. If you have a lot of money, and you want the best, well, you’re probably going to go for this lamp. It’s true that better things cost more…and this is most expensive lamp you’ve seen….so…it must be the best.

There’s also this “halo of awesomeness” that pieces like his will impart. Yes, the piece in an of itself is wonderful – but the knowing the high price for it amplifies it’s “awesomeness” as well. It’s an interesting effect, and definitely factor’s into it’s perceived value. People like us often mistake the psychological impact of price. I’m willing to bet that if you took that same piece – use the same photos even – and showed it to a group of people with a spectrum of income middle class to upper class, and told them one is $1500 and the other $7000, most of the people would say that the $7000 one is better.

One other issue – Rodel gets to work less, and be paid more. Nothing wrong with that; he can make, say, 5 of these a year, at $7,000 a pop, or 15 a year at $2,300 each. Which would you rather do?

 
2 Comments

Posted by on March 8, 2013 in BlogNotes


Tags: ,

Craftsman – What’s Old is New Again

limbert tableOriginally, Craftsman was not just a style, but a way of life.

Let’s go back….to the late 1800s. The industrial revolution is over; many things are made by machine now, especially furniture, though the furniture is still the same old style, just made faster – and more shoddily. Craftsmanship is pretty much gone out the window. People are sick of the industrial lifestyle – hard work in terrible conditions,  economic and social conditions that are unsatisfactory. Feeling separated from nature. In England, William Morris, an artist and writer leads a movement away from these troubling conditions, ushering in the age of the Arts and Crafts movement, and furniture that is later called “Craftsman” or “Mission” style (for an explanation of the difference, see my blog post Craftsman, Mission, Arts and Crafts – Whats the difference?).

The Arts and Crafts movement wasn’t just about furniture; it was about simplicity, wallpaper, home design; bringing in earthy tones and natural materials and simple man-made materials like wood, stone, tile, stained glass, animal figures and so on. It was an evolution – though going backward, in a sense.

But this is a woodworking blog, so we’ll focus on that. Studying the craftsman style, one will see simple symmetrical pieces with only moderate embellishment (and even the embellishments were simple). Joinery is solid, lasting, simple – witness the mortise and tenon joint. Embellishments were as simple as an arch in a stretcher, all the way up to inlays of beautiful, though somewhat simple patterns of different colored woods, and even some metals such as pewter and copper.

But why was this so? Again, it’s going back to the reason for the Arts and Crafts movement, and I think it’s worthing being aware of – especially today, when we have furniture atrocities in the manifestations of IKEA and home assembly fiber-board “furniture” from Wal-Mart, that has very little style, and certainly won’t last.

No, what their philosophy was on the matter of furniture is quite insightful. Gustav Stickley, whom one could really call the father of Mission furniture (at least in America), felt that those things that we want to keep around us in are home (furniture) should be as carefully selected as our friends; they should have certain qualities and characteristics before we allow them into our heart and home. He felt that inanimate objects like furniture have their own honesty, characteristics and qualities as well. If they do their job – their designed purpose – in a way that is consistent, done well, and are attractive pieces – then they should be welcomed into our homes. Which makes sense, when you think about it – would you want an ugly, uncomfortable chair whose leg sometimes collapses in your home? I would hope not; though some people put up with it. These pieces, Stickley felt, then become like old friends, which only adds to the richness and comfort of your home.

He addresses the craftsman (the person), saying, to paraphrase, that if he created a piece under duress, on an assembly line, with no passion, and no care for the creation, then the piece reflects that. However, if he has shown great passion in his work, and carried it out technically well, then the created piece will reflect that wonderful sentiment throughout it’s existence. In a sense, the craftsman breathes a soul into a piece.

And it’s quite true. If you are a good woodworker, do you have pieces about your home that you made that really add to your life? Would you miss it if it was gone? I know I do. I have a beautiful coffee table I made, and sweated over, refinishing it three times, because I didn’t get the finish right; it was one of my first major projects, and I had quite a time with it. But it turned out wonderfully. It is solid and attractive, and perhaps one day, my kids will enjoy it as much as I do.

Now, THAT is good woodworking.

 
Leave a comment

Posted by on March 3, 2013 in BlogNotes, The Craftsman Style


How to Make it Big in Woodworking

Sam Maloof

Sam Maloof

Are you the type of woodworker that wants to make it big? That is, have clients waiting for months from a piece from you; will pay the price you ask, and be featured in magazines? Many of us aspire to be; I know I do. Some of us are just content making nice things for ourselves and family. Nothing wrong with that. The guys that do well in this business are far and few between – at least it seems that way to me. Not that there isn’t a lot of talented guys out there, there certainly is. I’m speaking of the guys in the vein of a Sam Maloof, James Krenov or even Kevin Rodel. I have an aspiration to be in that league.  Let me make it clear – I’m not “making it big” right now in woodworking – either in standing or monetarily;  but I am continually working my way up, improving my skill sets, and wanted to share what I am doing – and trying to do – with you.

Like all professions, successful people in this field have certain traits and skill sets that, in my estimation at least, take them to the very top. In fact, it’s a pattern, of sorts; if you follow this pattern, you too may find yourself on top of the woodworking world. What I’ve listed below is probably not all-inclusive, but I think it does speak for a great part of that pattern I spoke of.

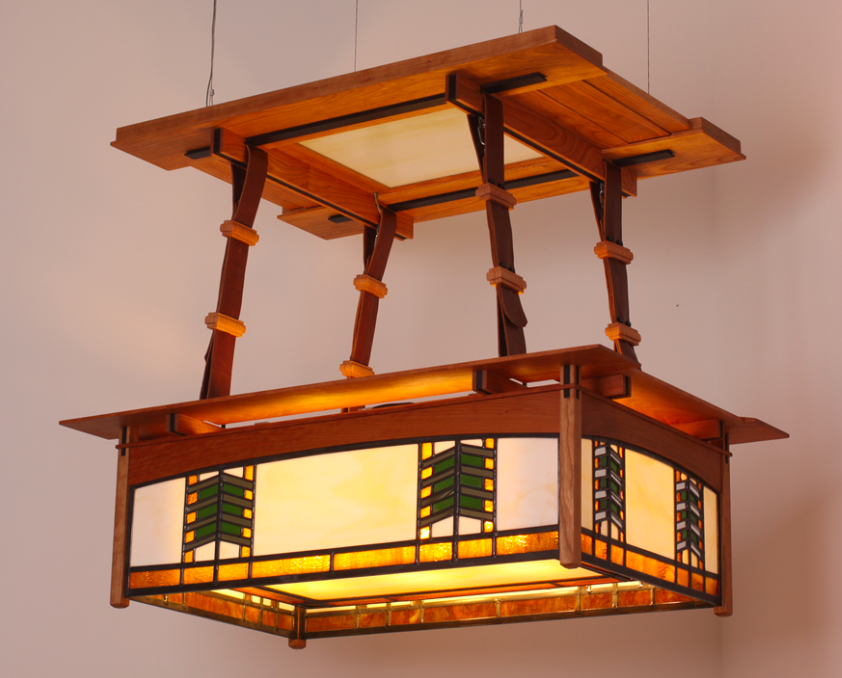
Originality. A lot of guys can take a plan and make a good piece from it, just as competent musicians can play great established tunes; but a great woodworker will be able to design a great piece, and carry it out, just like Lennon and McCartney wrote good songs and performed them.  Plainly put, if your design stinks, you’re going nowhere. Would we have heard of Sam Maloof without his rocker, or Krenov without his cabinet? Maybe not – they may have been just another very good – but not great – woodworker. Charles Limbert, Greene and Greene, Charles Rennie Mackintosh – all took from the Stickley Brothers; they designed along the same lines, but put there own design flair on the craftsman style.

Technical skills / Perfection. You need to be a proficient, if not an excellent, skilled craftsman; if you’re not, don’t bother selling. I’m not saying you need to be able to hand cut blind dovetails, build award-winning federalist furniture, or be skilled in the way of the Jedi Masters, but you need to have a piece that has solid joinery, and a very good, if not great, finish – at a minimum. Be proud that your name is on that piece of work. Personally, I try to be a perfectionist, at least in areas of a piece that are readily seen. If not, and that piece is going to be in my eyeshot, that little imperfection is all I’ll ever see on that piece, even thought it may be a great piece otherwise. In fact, I find that I have to not look at the piece for several months (if not a year or more), then go back and look at it, with “fresh eyes”, and re-evaluate it again, before I can say, “Yes, that one’s ok.” Aim for perfection.

Passionate. You need to show you have a zeal for woodworking. How do you expect others to get excited about your pieces, if you don’t? So how do you show passion? Well, you can show it in your descriptive text concerning the piece, or when you are showing it to a possible patron.

Photography. What good is building a great piece, if you have crap photography? I see so many guys with just abysmal photography. A white bed sheet draped over your couch as the backdrop, and a cheap cell phone camera, seriously? I get you may not have decent equipment or be trained in how to take a good photo – nor do you wish to learn how to do so – but get somebody who can. Maybe a photography student from a local college that is looking to beef up their portfolio. Doesn’t your piece deserve to be presented in the best manner possible?

Marketing. Forget craft shows, unless you just want to sell cutting boards, or other cheap items. Let’s face it, there isn’t, unfortunately, a big market for good woodworking. You need to leverage the power of the Internet, because a national, if not international market is required. My advice? Yes, you can have your own website – and not spend much, if any money; just use WordPress for your platform. Alternately (or in addition to), get an account at CustomMade.com. I’ve done fabulous on that site, and their fees are decent. I don’t see any benefit of selling thru a retail location on commission (seriously, you want 50% of my take? I’ll give you 20% max; you’re putting no money into stock, just a little space in your shop; sorry lady).  Etsy is ok, but that’s very much a craft woman’s place. It’s not much for expensive furniture, though smaller wood pieces do ok.

A Story. People love to buy into a story, whether it be the piece, you, or both. I’m not saying you have to write Moby Dick, but give the people something for their imagination to bite into. Here’s an example of what I mean, for, let’s say, a mantle clock:

Small craftsman clock, all maple, from a classic Stickley design. 17″ x 12″ x 5″.

Snooze. Now how about this….

I took the design of this clock from a piece I viewed at the estate of George Eastman, founder of Kodak. I asked the curator to let me take photos of it for design purposes. The wood used for it was actually from a tree that was blown down in a storm from his estate’s property, right here in Rochester NY.

So, which is more interesting to you? Same clock, different description. As for yourself, can you add anything? Something like this, perhaps:

My shop is located at the base of Whiteface mountain, in the Adirondacks of New York state. I buy my lumber from a local sawyer, as I like to support the local economy. Wood crafting has been a passion of mine since my grandfather took me into his shop some weekends, when I was only 15, and together, we made some simple, but useful pieces. I still have a small side table we built together…

Or, would you rather have something like this:

Woodworking since 1989. I’m a mechanic by trade, but I do this on the side. My shop is over 1200 square feet, and I have all DeWalt power tools, and is in the Detroit area…

Well, do you see the difference? When people spend money on a quality piece – and let’s face it, the stuff the better guys make is several times more expensive then what you’d buy at a retail furniture store – they don’t want just a piece of furniture, but a story behind it as well.

Reputation. Having one helps – a lot. I’m talking about being in Fine Wood Working magazine, or on a show, magazine, or other prominent venue. This will come in time – if you are good. My mentor is such a man. He can have all the commissions he wants. Thing is, he doesn’t do practical pieces, like furniture, but he does art woodworking – sculptures and such. When you think about it, a great idea. For one, not many guys do it, and for another, clients who want art usually have a ton of dough to be able to blow on it.

So there you have it, my observations on how to make it big – or at least, bigger. If you have any ideas on this topic, I’d love to hear it.

 
1 Comment

Posted by on February 18, 2013 in BlogNotes